
At-home nail care is clawing its way into our beauty routines. These are our three favourite Nordic solutions for an at-home manicure that lasts
Who hasn't been guilty of going too long between appointments at the nail salon? Not only does this bad habit leave our nails naked, with a less-than-appealing grown-out finish. It also leaves us open for the gel coming loose, peeling loose and ruining your natural nail. But who has the time for finger-focused TLC?
Fret not. In the quest for salon-worthy nails from the comfort of our homes, the Nordics have emerged as a hotspot of innovative solutions – be they diamond-infused polishes or next-gen press-on nails. We've had the unique opportunity to try these groundbreaking products and get expert advice from each brand to ensure the best results.
Below, discover three Nordic alternatives to your next nail appointment:
Alûstre's diamond-infused polishes
An at-home manicure can often feel daunting or even seem like an effort in futility – especially when considering the typical life span of a slapdash layer of polish; but, with some expert advice and the right products, you could boast a chip-free colour for more than a week. Our preferred polish in question? A three-step diamond-infused approach courtesy of Danish beauty brand Alûstre.
The brand's global head of product, Therese Niko Busch, emphasises the practical luxury of Alûstre's products. “At Alûstre, we aim to make luxury accessible and a part of everyday routines. Our products are easy to apply, quick-drying, and long-lasting, simplifying home manicures, even for those who aren't professional manicurists.” This is particularly evident in the lasting power of the nail polish, which means less frequent application and more time saved.
First, ensure your nails are clean and free from oily residue. Start by applying a single coat of the 055 Basecoat, meticulously covering the entire nail bed. "This step is crucial for a smooth canvas. Give it a minute to dry," advises Busch.
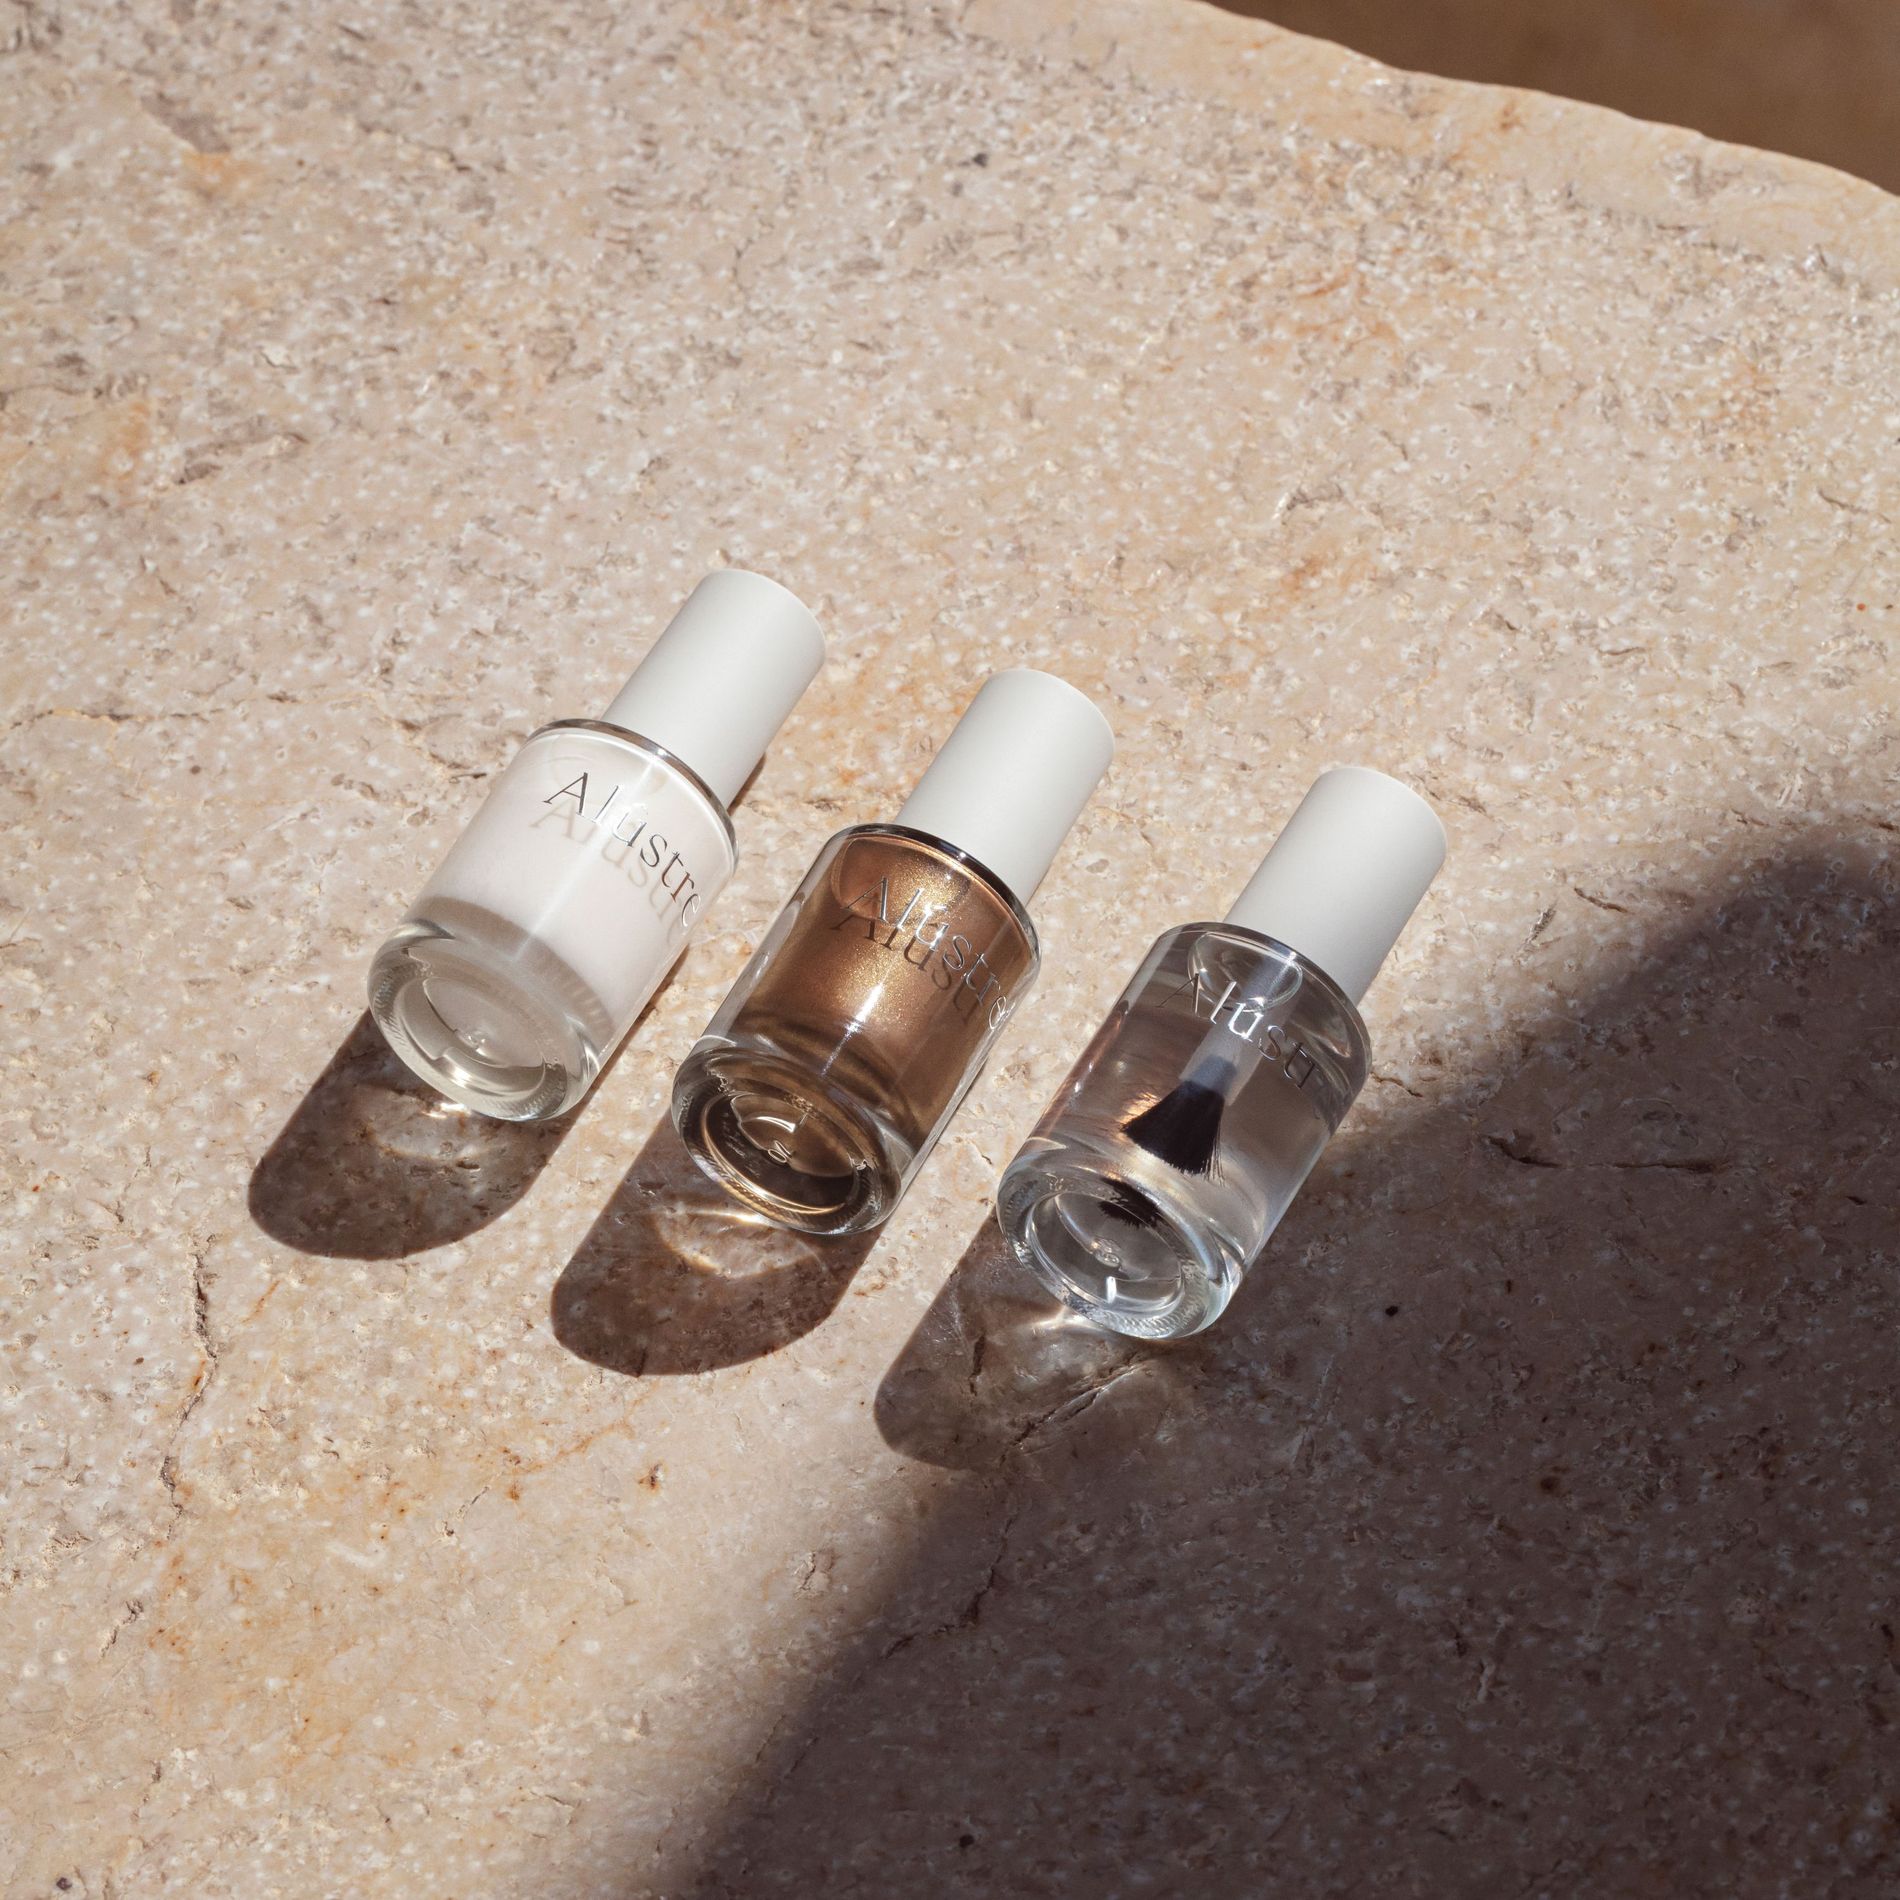
Photo: Alûstre
Then comes the star of the show, the coloured polish. Apply one layer of this vibrant polish, beginning at the cuticle and working towards the nail's edge. Aim for two strokes per nail for an even spread of colour. "Cap each nail by brushing the tip of the applicator along the nail's edge for a complete and lasting look, advices Busch, before applying the second coat after two to three minutes to amplify the hue and durability.
For Busch, the only natural choice is the brand's 631 Orange – a vibrant Turmeric shade. "This sparkling colour brightens up every outfit and every mood," she exclaims. "It's a true hero product."
Once the colour layers are set, seal the deal with a layer of the 000 Top Coat. “Feel free to reapply it during the week for a gloss boost or to prolong your manicure further.” Finally, wait a full 24 hours before applying any hand care products to ensure the formula sets perfectly, maintaining its high performance.
Switch Nails - Next generation press-ons
Switch Nails, a Swedish brand founded by Celina Rydén represents the new era of press-on nails, marrying salon-quality results with a solid commitment to sustainability. Better yet, the brand offers a temporary alternative to women who usually can’t sport done-up paws – be it due to work mandates or financial strains.
Rydén explains the brand’s unique approach: “Instead of traditional nail glue, which contains cyanoacrylate and can damage natural nails, we use ‘glue-tabs’ for a more gentle application.” These tabs, acting like a gel-like double-sided tape, offer a cushioning effect and are ideal for those seeking a less damaging alternative – all to make at-home application a breeze. “Our glue-tabs allow for the easy removal and reapplication of the nails, whether you want them for an evening, a weekend, or up to one to two weeks at a stretch,” Rydén adds.
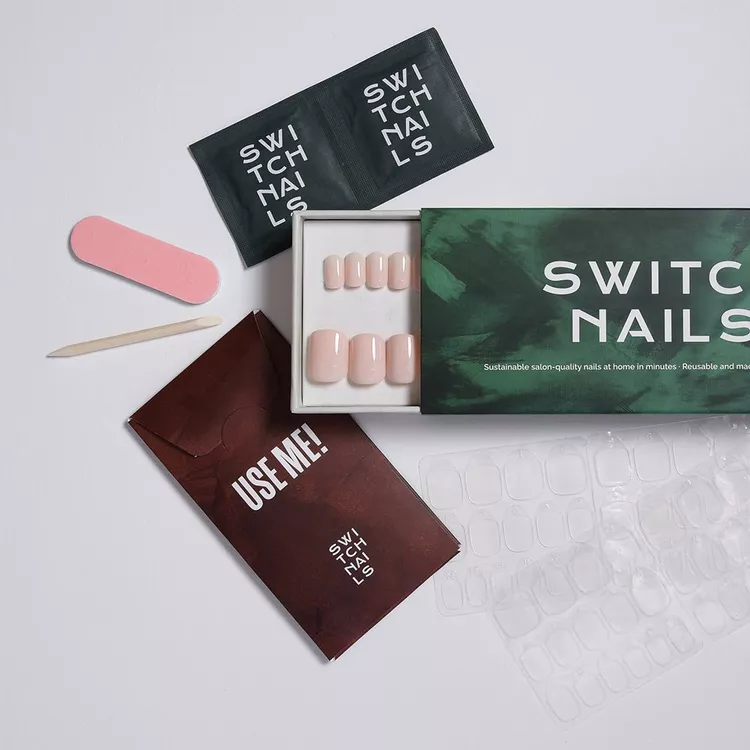
Photo: Switch Nails
Rydén, a nail educator for over 18 years, recalls her own experiences as a child with plastic nails and glue, which is often the image people have when thinking of press-ons - flat, downward-curved, with poor fit. "But Switch Nails is an entirely different product," says Rydén. "Our nails are also topped with a gel-like top coat, making them genuinely comparable to salon nails."
As for application, each package includes a QR code leading to an instructional video that guides customers step-by-step in applying their Switch Nails. Rydén's top tip for longevity is not to rush the prep work. "Ensure a completely dry and clean surface to work on, as dust, dirt, and natural oils prevent the glue tab from adhering. If you want the nails to last even longer, use the small file included in the box to roughen the surface gently."
"Focus on ensuring that the part closest to the cuticle is tightly sealed, then fold the rest of the press-on nail over the natural nail. If you lay the press-on nail correctly on the natural nail, there will be no gap at the back where water can enter, or hair can get stuck, which would cause the nails to come loose," Rydén directs.
Neglefeber - An at-home gel kit
Creating an at-home gel manicure that rivals a salon's work may seem like a pipe dream, but thanks to The Gel Collection from Neglefeber, really, all it takes is practice. But this isn't your average swipe-and-dry affair. UV Gel Polish demands a bit more love and care. Filing, buffing, and cleaning: It's the kind of meticulous prep work that makes the gel cling to your nails.
Founder Signe Hartung Roslyng shares the step-by-step prep of the ultimate gel application: "The main distinction between applying Air Dry Nail Polish and UV Gel Polish, apart from the need for UV curing, lies in the extensive nail preparation required for UV Gel Polish," she says. First, file your nails to the desired shape and length.
Next, push back the cuticles with the cuticle pusher and trim any excess skin if necessary before buffing the nail surface, paying extra attention to the sides and around the cuticle area. Finally, cleanse the nails to remove oil and dust, ensuring the nails are matte and dry, before applying a coat of Prep&Prime. "This step is crucial for cleaning and dehydrating the nail, ensuring optimal adhesion," says Roslyng.
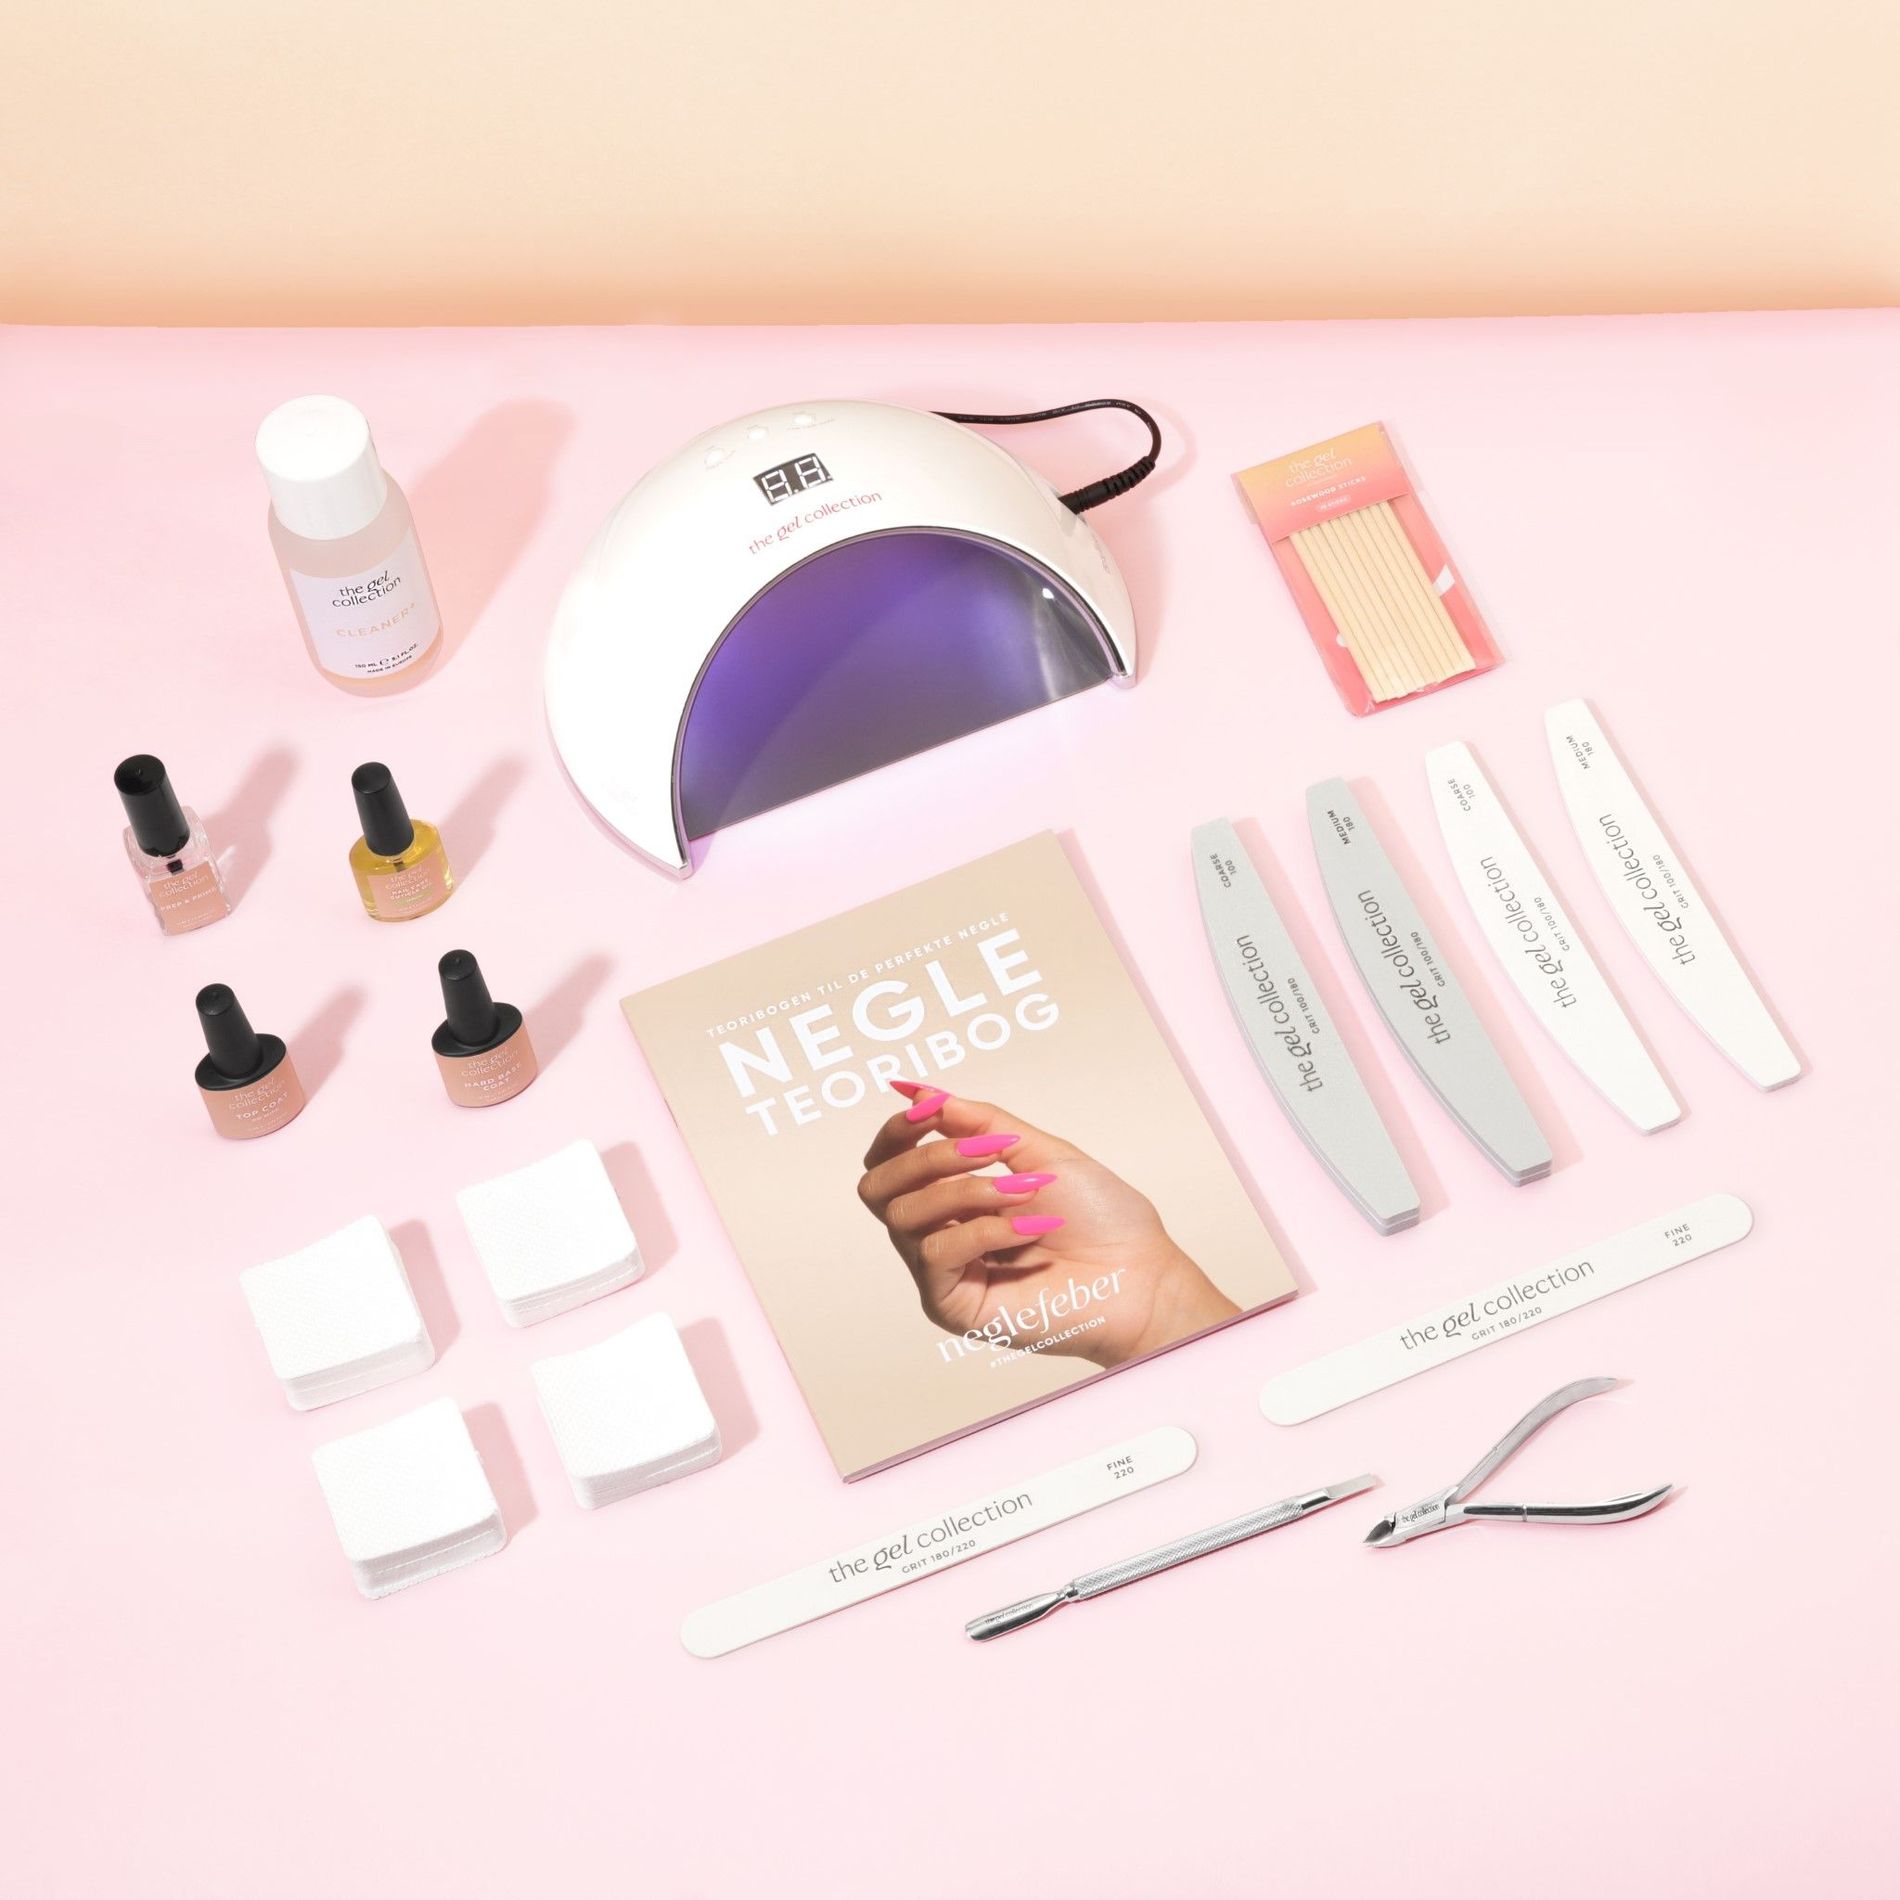
Negelfeber's Gel Polish premium kit. Photo: Negelfeber
Before use, ensure your Gel Polish is well mixed for even colour distribution. “Gently roll the bottle between your hands instead of shaking it to avoid air bubbles,” says Roslyng. Next, apply a thin layer of Hard Base Coat in thin strokes before applying your Gel Polish colour, as “thinner layers prevent wrinkles and ensure even curing,” says Roslyng. Top it all off with a glossy No-Wipe Top Coat. Between each step, cure the polish for 60 seconds. The results? A salon-level outcome that lasts up to three weeks.
But what about those little concerns nagging at the back of your mind? Thin, fragile nails? Roslyng assures us that it’s not just slathering products on; it’s understanding the nail and the UV process. Suppose you’re fretting about the potential dangers of UV-curing gels. In that case, Roslyng reassures that it’s usually not the gel but the over-enthusiastic filing or improper removal that plays the villain. Gentle and meticulous is the mantra here.